Remember last fall when my brother and I made his famous Fist Sized Meatballs? We had so much fun that we had been talking about finding something else to cook. Recently Chris called, and said how about pierogi?
Now I don’t adore pierogi, but I like them, and because I am 25% Polish it still seemed like a fun experience that I should try at least once. Well…. fun yes but holy wow so much work. Probably only to be attempted by people who really love pierogi. My brother took our results home to my sister, who does adore pierogi, and she devoured them all instantly, proclaiming them, and I quote, “AWESOME” (it was over text). So I am pretty sure we did it right and I am just as sure I won’t be attempting it again any time soon. But for your reading pleasure, I present our pierogi making adventure….
We decided (maybe this was our first mistake?) that as long as we were making pierogi, we were going to triple the recipe and then try making several different kinds of fillings. We knew one would be potato (I will be telling you more about that one in an upcoming post), we decided to make one dessert pierogi (stay tuned for that one as well), and then we decided to play with different meat fillings. We totaled out at 4(!), 3 of which were a success and one of which, our single attempt at fusion pierogi with a chorizo filling, very much did not work. I think mushroom would make another fantastic filling, but my brother hates mushrooms, so….

The simplest filling we made, and my brother’s favorite, was bratwurst and onion, chopped and sautéed together. When the onions were browned and the bratwurst cooked, I mixed in a dollop of Dijon mustard. That’s it, super simple and super tasty (another thing I learned while making pierogi is that I do adore pierogi fillings, just not so much the pasta).
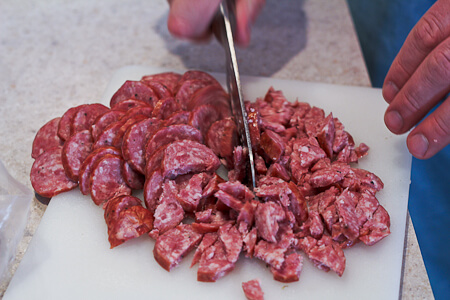
The next meat filling is also pretty simple. We sautéed onions (almost all the fillings started with onions) and then added diced kielbasa. It was plenty tasty as was, but I decided to add some dill to jazz it up a bit. All I had was dried dill–I would be very curious to try this again (the filling, in some other use, like a shepherd’s pie or something) with fresh dill. The filling was good, but it did not have as much wow factor as I would have liked.
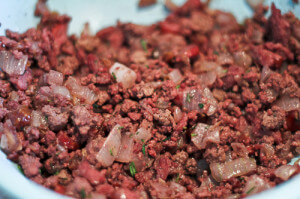
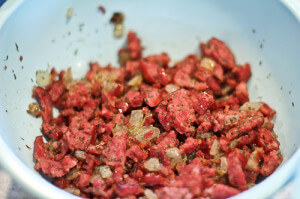
This last filling was my favorite, and the one I am most proud of. It was so delicious, I am determined to try it again as the filling in a shepherd’s pie. We started with onions and ground beef, to which I added a small amount of diced kielbasa, red wine and thinly sliced dates. At this point it was super tasty. Then, at the end and on a whim, I added minced fresh rosemary from the plant on my windowsill. WOW. I found my wow factor.
I realize this has been an oddly lukewarm post, because what I learned about pierogi is that I don’t love them enough for the work. But if you do love them, I cannot emphasize enough how much fun it is to make the filling. Mostly because anything goes, and if it sounds good it is worth trying. Just remember that the flavor should be strong enough to stand up to the pasta and, even if, like the chorizo, it does not work, it will not be the worst thing ever.
I found the recipe for the basic pierogi dough in Anne Applebaum’s From a Polish Country House Kitchen: 90 Recipes for the Ultimate Comfort Food. (It is a gorgeous cookbook–I highly recommend checking it out). While I did not change the ingredients, I completely changed the method. The cookbook remains true to a very traditional, hands on method of kneading and rolling out the pierogi. I hate rolling out. I just could not make myself do it. So if you have a mixer, and especially if you have a pasta roller, my instructions have been updated for using that equipment.
- 3 cups (390 g) AP flour plus more for dusting
- 1 large egg
- 2 t vegetable oil
- 1 t salt
- 1/2 - 3/4 cup warm water
-
You can do this by hand, but I found it easier with my mixer.
-
Add the flour to the mixer bowl, and make a hole in the center. Attach the kneading hook to the mixer.
-
Whisk together the egg, oil and salt. Pour it into the hole in the flour. Turn the mixer on.
-
Add the water gradually, letting each tablespoon or two absorb before adding the next. You are looking for a soft, pliable dough that is not sticky. I tripled this recipe and had trouble reaching this stage, but if you can use a pasta roller, as I did, it does not matter so much. Ideally, you will knead the dough for 8 minutes once all of the water has been added.
-
Cover the dough with plastic wrap and let sit on the counter for 1 hour.
-
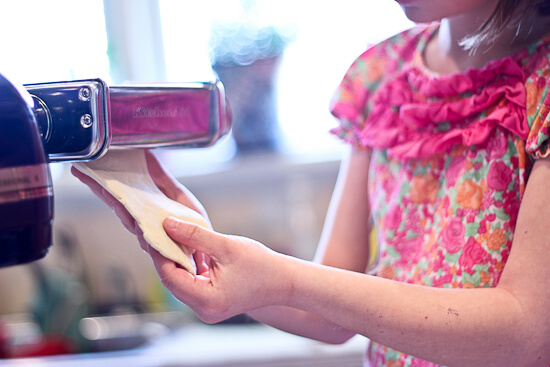
Attach the pasta roller to your mixer (you can also roll the dough by hand). Following the roller instructions, or rolling by hand, roll portions of the dough to 1/8-inch thickness.
-
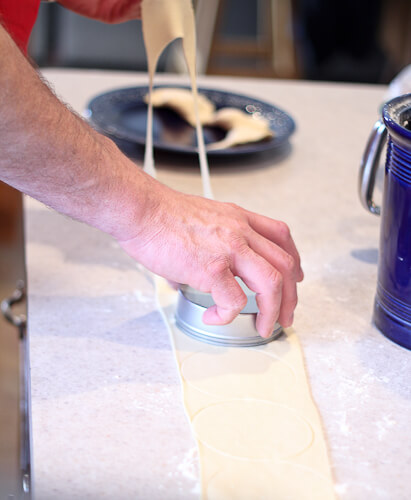
Using a large cup or biscuit cutter, cut circles 2-3 inches in diameter.
-
Place about 1 tablespoon of filling into the center of the dough.
-
Fold into a half moon and press the edges together to seal. My brother stopped there, but I liked pressing a fork into the edges to make a fancier edge. If the dough dries out, add a little water to help the edges stick.
-
Set a large pot of salted water on to boil.
-
While you are waiting to boil your pierogies, place them in a single layer on a flour dusted cookie sheet.
-
Place several (how many will depend on your pot, we placed 8-10 in a 8 qt pot) pierogi into the boiling water. Once they float, boil an additional 5 minutes.
-
Use a spider or slotted spoon to remove the pierogi. Place them on a cooling rack to drain.
-
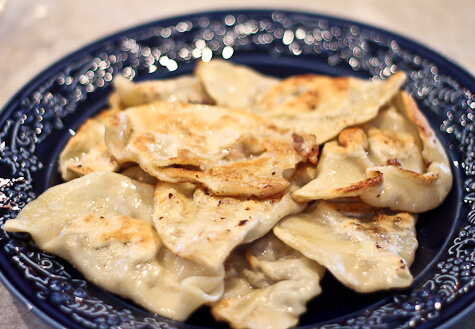
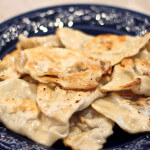
The pierogi are fine to eat now (I actually prefer them just boiled with the traditional potato filling), but they may also now be fried in butter, over medium high heat, until browned on both sides.
-
Serve with sour cream for the potato filling and whatever condiment sounds right for any other filling.
This is so great! My inlaws are Polish and I’ve always wanted to try this!!! 😉
If you do, let me know how it goes! And may I recommend having lots of people over to eat them? I suspect my brother and I also got a little burnt out because we felt compelled to eat them all, and that got heavy fast!
The pasta looks great! Thanks for sharing with me.
You have a great site!
Delish! I love pierogis! I can’t wait for the potato one!
I’ve only ever really eaten a handful of pierogi but at least you got to bond/hang out with your brother and share some of the work! Making them is the kind of thing I’d hate though, since I can barely stand scooping multiple batches of cookies. I’m so impatient.
Your cousin, Natalie, makes them on a regular basis. Maybe she knows something that makes it easier. I’ve never made them by myself. I made them with Aunt Genna before. I think they rate right up there with gnocci. I’ve made those lots of times, with Aunt Gloria, and by myself. Really good, but lots of work!