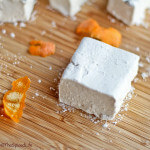
Orange Marshmallows
Ingredients
- 2 envelopes gelatin (I always use Knox)
- 1/3 cup + 3 T cold water
- 1 1/3 cups + 2 T granulated sugar
- 1 cup + 3 T light corn syrup
- large pinch salt
- 9 T cold water (separate from water above)
- 2 t vanilla extract
- 1/4 t orange oil
- approx. 1 cup powdered sugar
- 1/2 cup potato or cornstarch
Instructions
-
Choose a 7 or 8 inch square nonstick pan (I have only tried nonstick–may work fine with others, I cannot confirm). Dump a heaping 1/3 cup of powdered sugar into the pan. Shake it from side to side and use your fingers to “coat” the sides of the pan. The powdered sugar will stick in patches, which is fine. Leave it in the pan; it may be uneven, which is fine.
-
I have heard some people say they could make marshmallows in a mid strength mixer (eg, the Kitchen Aid Artisan); I personally would only be willing to try in a professional grade/heavy duty mixer unless I knew I had the cash to replace the mixer! DO NOT USE A HAND HELD MIXER!!!
-
Place the gelatin in the bottom of the mixer bowl. Prepare the water measurements and set aside the larger water (1/3 cup + 3 T) beside it.
-
Find a heavy bottomed, preferably copper or stainless steel, 2-3 quart saucepan and place inside it the 9 tablespoons of water, light corn syrup, sugar and salt. Have ready a candy thermometer. Place the pot on low heat and cover it.
-
Dump the other water over the gelatin–it should sit for 15 minutes--it will work to be the amount of time it takes to prepare the sugar.
-
While the gelatin is soaking, stir the sugar mixture 2-3 times, very gently each time. When the sugar has dissolved, remove the lid, attach the candy thermometer to the side of the pan, and turn the heat up to high (medium high for induction). From here on out do not stir or otherwise bother the sugar. Keep an eye on the thermometer; you want to boil the sugar to 248-250 degrees F.
-
When the sugar mixture reaches 248-250 F, slowly pour it in to the mixer bowl with the whip attachment mixing on the lowest speed. Be very careful to not let any of the boiled sugar touch your bare skin. After the sugar is all in the bowl, slowly increase the speed to medium low and beat for 1 minute. When the mixture is totally blended, increase the speed to high and beat for 2 minutes. Reduce the speed back down to low and add the vanilla and orange oil. Increase back to the highest speed again and beat for 8 minutes.
-
Place a sturdy spatula into a bag of powdered sugar.
-
During this time the mixture will become more opaque and whiter. It will also become much, much thicker. I check the back of my mixer every so often during the 8 minute beating–if it should ever get dangerously hot, well, I guess either quit or cross your fingers.
-
Here comes the exasperating part–but with practice it will become less tricky. Quickly undo the whip attachment and set it aside–accept that you will lose some fluff sticking to it. Using that very sturdy spatula that has preferably been dredged in powdered sugar, quickly and firmly scrape the marshmallow fluff into the prepared baking pan. It will astound you how fast it sticks to everything! When I first started making marshmallows I saved that sticky fluff like it was gold and spent long minutes scraping it into a cup of hot chocolate. Nowadays either the kids lick it off or I just throw it in the sink and accept it as lost.
-
Take a few tablespoons of powdered sugar and sprinkle it around the edges of the pan, right up against where the marshmallow meets the sides of the pan.
-
The marshmallows now need to cure by sitting out at room temperature for 6-8 hours. If it is particularly humid, it may take longer.
-
Whisk together 1/2 cup of confectioners' sugar and 1/2 cup potato or cornstarch. Sprinkle some of it onto a wooden cutting board.
-
At the end of the curing time, take a narrow spatula and run it along the sides of the pan to loosen the marshmallows. You will be astounded at how it all lifts out in one gigantic marshmallow cake–quite easily. Place the marshmallow on a wooden cutting board sprinkled with powdered sugar and have a bowl of the remaining sugar-starch mixture sitting at the ready. Slice the marshmallows with a large chef’s knife, dredged in powdered sugar. Use a swift, decisive, downward slicing motion, kind of like mincing an herb but more time between slices. Do not try to saw at the marshmallows. The marshmallow center will stick to the knife–just pull it off and keep going. As you slice each individual marshmallow, dredge it in the powder sugar and set it aside in a single layer.
-
Store in a single layer in an airtight container. Marshmallows for plain eating are good for at least a week. Marshmallows for dipping and melting in hot chocolate will last far longer, since a little drying out is not noticeable.
-
Do not double this recipe, it won’t work. Just make it twice (I have been known to use a round pan to make a second batch–leaving the rounded edge pieces for our family).