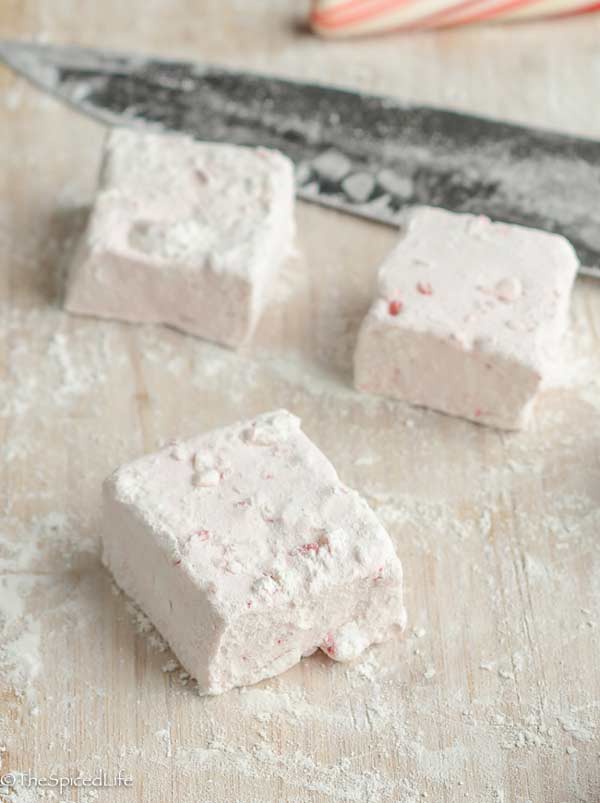
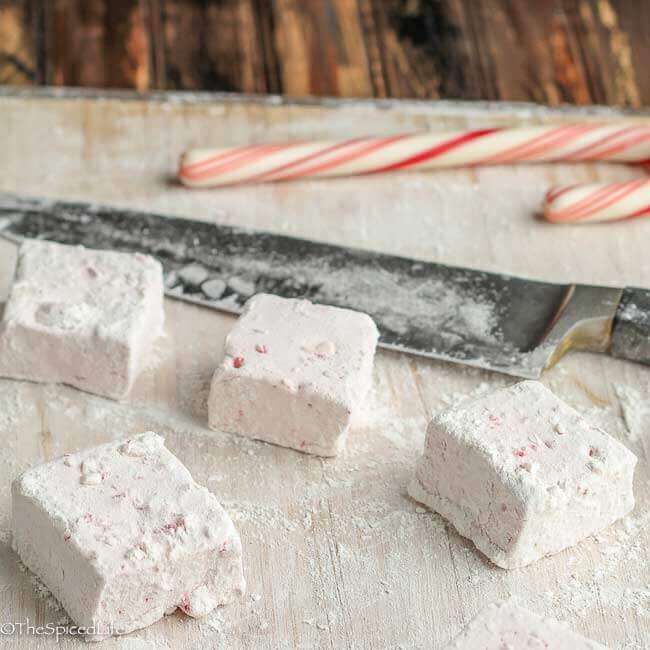
Creamy Peppermint Marshmallows are festive, delicious, and an absolute necessity for hot chocolate as far as my family is concerned! Affiliate links have used in this post to link to items I am discussing.

[December 2015: I will never forget how excited I was to share this recipe with everyone, and how crestfallen I was when everyone found the green marshmallows very off-putting. My baby blogger self had not considered that green is a color that brings to mind radioactive ingredients apart from veggies and, well, it did not go over well. Some people were cruelly blunt! For a long time I lived in denial and left these photos alone. But how silly is that when I make these creamy peppermint marshmallows every single year to great acclaim? I start at the holidays, and we keep them on hand all winter long! I have made them green (my kids don’t think bright green things look radioactive!), red, and, most often, I actually make them with crushed candy canes. And so I am finally getting around to updating the photos–but I think I will leave one green marshmallow photo just to show how far I have come!]
This post has been a verrrry long time coming. Who doesn’t think homemade marshmallows would make a great blog post? I was somewhat derailed by the chaos last holiday season of moving into a new home, but really that was just a convenient excuse: in actuality I was trying to convince myself that one day I would wake up and be able to cleanly and beautifully slice marshmallows– like Smitten Kitchen might. Or use real butter.
But alas these hands are going nowhere, my patience is not improving, and these creamy peppermint marshmallows kick ass, so I should just get you the recipe in time for the holidays.

I used to think I disliked marshmallows–except in S’Mores of course. I never understood the attraction to industrially created confections sitting like lumps in my hot chocolate. Actually, I never understood the attraction to hot chocolate either, if you want to know the truth. I find hot cocoa sickeningly sweet (there! I said it!!). Hot cocoa time after playing in the snow was always a lonely moment for me growing up (cue the violins).
Enter Williams & Sonoma and their very extravagantly priced but oh so delicious holiday hot chocolate and marshmallows. Who knew marshmallows could melt like that? Who knew they could make your hot chocolate so creamy? And why, for goodness’ sake, did I not realize you could make hot chocolate from chocolate, not cocoa?!?!?
An obsession was born.

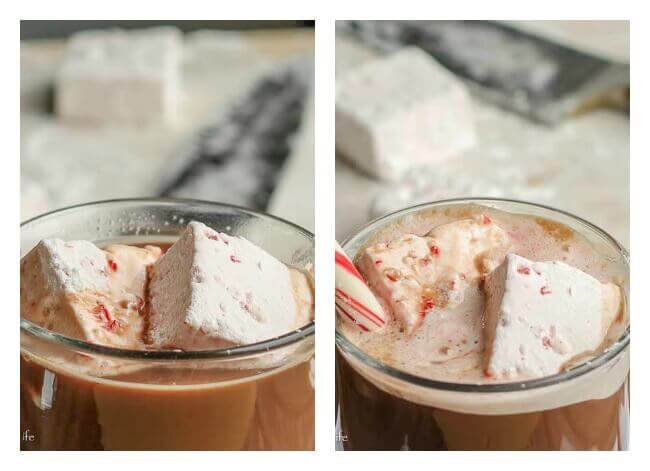
Check out the marshmallows slowing melting into oozing, creamy deliciousness!
For a while I still did not believe *I* could make marshmallows. I figured they needed some fancy equipment. Then I found some recipes in Lisa Yockelson’s ChocolateChocolate and decided to try and make some for John’s birthday. It was quite the process, that first time. I was very intimidated by the recipe, certain I would pour scalding boiled sugar all over my 4 mos old and 19 mos old getting under my feet (well the elder anyway). I asked my mother in law to please come and stay with us (I was making John an entire birthday feast) to keep the kids out of my hair. The recipe was also stressful because it really gives your professional grade mixer a workout–and my mom had just had hers blow out, so I spent the entire time panicking it would kill the most important appliance in my kitchen.

But it did not; it was a rousing success–far superior even to Williams & Sonoma’s. I now make marshmallows frequently during the cold months, with barely any forethought. It turns out it is quite easy, and as long as you have a professional grade mixer it is, knock on wood, not a problem (do NOT try this with a hand mixer!!). They make excellent gifts and are likewise excellent treats to have around when company is coming. And I am always certain to also have on hand lots of real chocolate suitable for hot chocolate. I finally get to appreciate that iconic American pastime–hot chocolate after playing in the snow!
I have made several different flavors of marshmallows, but in the end I always return to peppermint. I make them extra strong because we do not eat them plain much, but rather let them flavor our hot chocolate. After candy canes come onto the market, I like to smash them up really fine and add them with the extracts–that is especially good.
I sometimes like to swirl some color into my creamy peppermint marshmallows at the end. I have never achieved a truly gorgeous swirl–I know some recipes advocate using a wooden spoon but I tried that once with this recipe and what a joke. Do not waste your time, sanity, and hard work (because a lot of marshmallow goo will be lost to the spoon) attempting to swirl that way. If you have kids, or, like me, just like some color in the holidays, do it at the end with the mixer on low and accept they will not be perfect. As I get closer to the holidays I will use red. I should also add that I have yet to try to swirl the color in after the marshmallows are in the pan, which I have heard works better but I keep forgetting to try!
[Because I have updated this recipe to format correctly, I needed to move the step-by-step photos, so now I have them before the recipe, all in chronological order:]
- 2 envelopes gelatin (I always use Knox)
- ⅓ cup + 3 T cold water
- 1⅓ cups + 2 T granulated sugar
- 1 cup + 3 T light corn syrup
- large pinch salt
- 9 T cold water (separate from water above)
- 2 t vanilla extract
- 2 t peppermint extract
- several drops peppermint oil or approx. 2-3 full size candy canes, crushed
- approx. ½ cup powdered sugar
- Choose a 7 or 8 inch square nonstick pan (I have only tried nonstick--may work fine with others, I cannot confirm; Yockelson prefers thick marshmallows with a 7 inch square pan but I like smaller marshmallows plus I already owned an 8 inch square pan). Dump a heaping ⅓ cup of powdered sugar into the pan. Shake it from side to side and use your fingers to "coat" the sides of the pan. The powdered sugar will stick in patches, which is fine. Leave it in the pan; it may be uneven (see my picture up above).
- Place the gelatin in the bottom of the mixer bowl. Prepare the water measurements and set aside the larger water (1/3 cup + 3 T) beside it.
- Find a heavy bottomed, preferably copper or stainless steel, 2-3 quart saucepan. Add the 9 tablespoons of water, light corn syrup, sugar and salt to the pan. Attach a candy thermometer to the side of the pan--do not let the actual thermometer touch the bottom of the pot. Place the pot on low heat and cover it.
- Dump the other water over the gelatin--it should sit for 15 minutes.
- While the gelatin is soaking, stir the sugar mixture 2-3 times, very gently each time. When the sugar has dissolved, remove the lid and turn the heat up to high. From here on out do not stir or otherwise bother the sugar. Keep an eye on the thermometer; you want to boil the sugar to 248-250 degrees F.
- When the sugar mixture reaches 245-248 F, slowly pour it in to the mixer bowl with the whip attachment mixing on the lowest speed. Be very careful to not let any of the boiled sugar touch your bare skin.After the sugar is all in the bowl, slowly increase the speed to medium low and beat for 1 minute. When the mixture is totally blended, increase the speed to high and beat for 2 minutes. Reduce the speed back down to low and add the extracts and oil/crushed peppermint. Increase back to the highest speed again and beat for 8 minutes.
- During this time the mixture will becomes more opaque and whiter. It will also become much, much thicker. I have included a series of pictures that I took--you cannot see the whip attachment it is moving so fast, so the pictures are a little blurred, but it gives you the basic idea. I check the back of my mixer every so often during the 8 minute beating--if it should ever get dangerously hot, well, I guess either quit or cross your fingers.
- If you want to color the marshmallows, reduce the heat to medium low, grab the color you want, reduce the heat to low, and squirt some in. For a more swirled effect, like what I have, only let it run a few seconds. Let it run longer to completely color the marshmallows. See my notes above for more comments on coloring marshmallows.
- Here comes the exasperating part--but with practice it will become less tricky. Quickly undo the whip attachment and set it aside--accept that you will lose some fluff sticking to it. Using a very sturdy spatula that has preferably been dredged in powdered sugar, quickly and firmly scrape the marshmallow fluff into the prepared baking pan. It will astound you how fast it sticks to everything! When I first started making marshmallows I saved that sticky fluff like it was gold and spent long minutes scraping it into a cup of hot chocolate. Nowadays either the kids lick it off or I just throw it in the sink and accept it as lost.
- Take a few tablespoons of powdered sugar and sprinkle it around the edges of the pan, right up against where the marshmallow meets the sides of the pan (see picture above).
- The marshmallows now need to cure by sitting out at room temperature for 6-8 hours. If it is particularly humid, it may take longer. At the end of the time, take a narrow spatula and run it along the sides of the pan to loosen the marshmallows. You will be astounded at how it all lifts out in one gigantic marshmallow cake--quite easily. Place the marshmallow on a wooden cutting board and have a bowl of (yet more) powdered sugar sitting at the ready. Slice the marshmallows with a large chef's knife, dredged in powdered sugar. Use a swift, decisive, downward slicing motion, kind of like mincing an herb but more time between slices. Do not try to saw at the marshmallows. The marshmallow center will stick to the knife--just pull it off and keep going. As you slice each individual marshmallow, dredge it in the powder sugar and set it aside in a single layer.
- Store in a single layer in an airtight container. Marshmallows for plain eating are good for at least a week. Marshmallows for dipping and melting in hot chocolate will last far longer, since a little drying out is not noticeable.
For the collage fans…

This makes me want to try. I have a KA Accolade 400 watt mixer, and am not sure I dare.
Did you ever have a failure with this recipe? I do know I have a great thermometer and would not worry about getting the correct temperature.
Your marshmallows are beautiful by the way!
Nope never had a fail. 🙂
My Pro is 525 watts… My paranoia stems from 2 things: Yockelson's warning and also the fact that my mom had hers blow out (her pro) while kneading bread and when she contacted KA it was apparent that we, as bakers and cooks, do lots of things with our mixers that are not manufacturer approved. I am pretty sure they would not approve of this recipe! 🙂 Which makes me very nervous of telling anyone to do it. However, having said all that, Joe from Culinary In The Desert and a friend from the CLBB apparently makes marshmallows all the time with his Artisan (which must be around your 400 I would think).
Wow, this makes me wish I could make these. But I would be too scared. Not sure why – maybe the whole thing about needing a thermometer.
Also makes me wish you lived round the corner so I could come over for some hot chocolate and pappermint marshmallows. Not that I needed this post to make me wish that. 🙁
I'm with Elizabeth on paragraph 2!
I have to check out her recipe to compare, since I took it a couple years ago but then never did anything with it — but my MIL makes marshmallows now and then and I think she just has a regular-grade mixer. She has never indicated that it's a problem.
Also, maybe you could swirl using something really skinny like a skewer, so you'd have minimal gooping loss but it would still do the trick?
Amy: I think I have heard a skewer recommended if you swirl directly in the pan. I tried a skewer once pre-pouring and it broke the skewer!
i've yet to make my own marshmallows, which is shameful since i love them so. i love that peppermint is involved here, and i love that you add color to yours. it's so much more fun to watch them melt when they're green!
marshmallows are so intimidating to me!
Not many people in this world can claim they've made green homemade marshmallows. Kudos! I need to try making these on my own since its hot chocolate weather!
LOL, I've always said that I was a scaredy cat baker and yet I've made marshmallows (as well as caramel many times). It really isn't that difficult and is kinda fun if you don't mind the sticky yumminess. I've used my artisan and the recipe I made called for 9×13 pan. But again it was a different recipe.
Your print marshmallows sound and look good. I love the photos of them melting into the hot chocolate.
~ingrid
Wow!Those marshmallows look beautiful and delicious!
Oh, they look very alien melting in the hot chocolate and also very cool.
WOW! This is fantastic!
Awesome picture, very attractive colour.
that is one festive looking marshmallow, perfect for the holidays
Thank you for the inspiration. I am planning on making marshmallows this year for part of my holiday gifts. I feel better about it after reading your post.
These look amazing! I've never made marshmallows before, but I'm quite intrigued! I think they would be great in a chocolate-flavored coffee!
I found your blog when trying to find suggestions on swirling color into homemade peppermint marshmallows. Reading your blog and directions was like reliving my process over the last couple years! I have a similar recipe and my KA 300watts has no problem keeping up. My recipe has me brushing the pan with vegetable oil which works fine but I will try your idea with powdered sugar next time. I use a large jelly roll pan which makes them spread out and are not as thick. One batch goes a long way when you cut them smaller. I make several batches and bag them up as teacher, friend gifts at the holidays and everyone loves them. Also love the idea of crushed candy canes. Thanks for all the suggestions on swirling. I'm going to try a metal skewer in the pan next time. The perfect swirled marshmallow will be my mission in the coming years.
I have only made homemade marshmallows a few times, but never peppermint, I bet they would be perfect for nights spend sipping cocoa by the fire